Free tutorial; how to cover a journal with wallpaper samples

I have discovered that it is so easy and it looks so professional to cover an alter book journal or any journal with wallpaper samples. The kind that I am using in this tutorial is a thicker wallpaper that I sell in my etsy store. I thought that it would be helpful to share how I do these covers. I start with the book or the journal that I want to cover.

Here is all that I need to make this cover

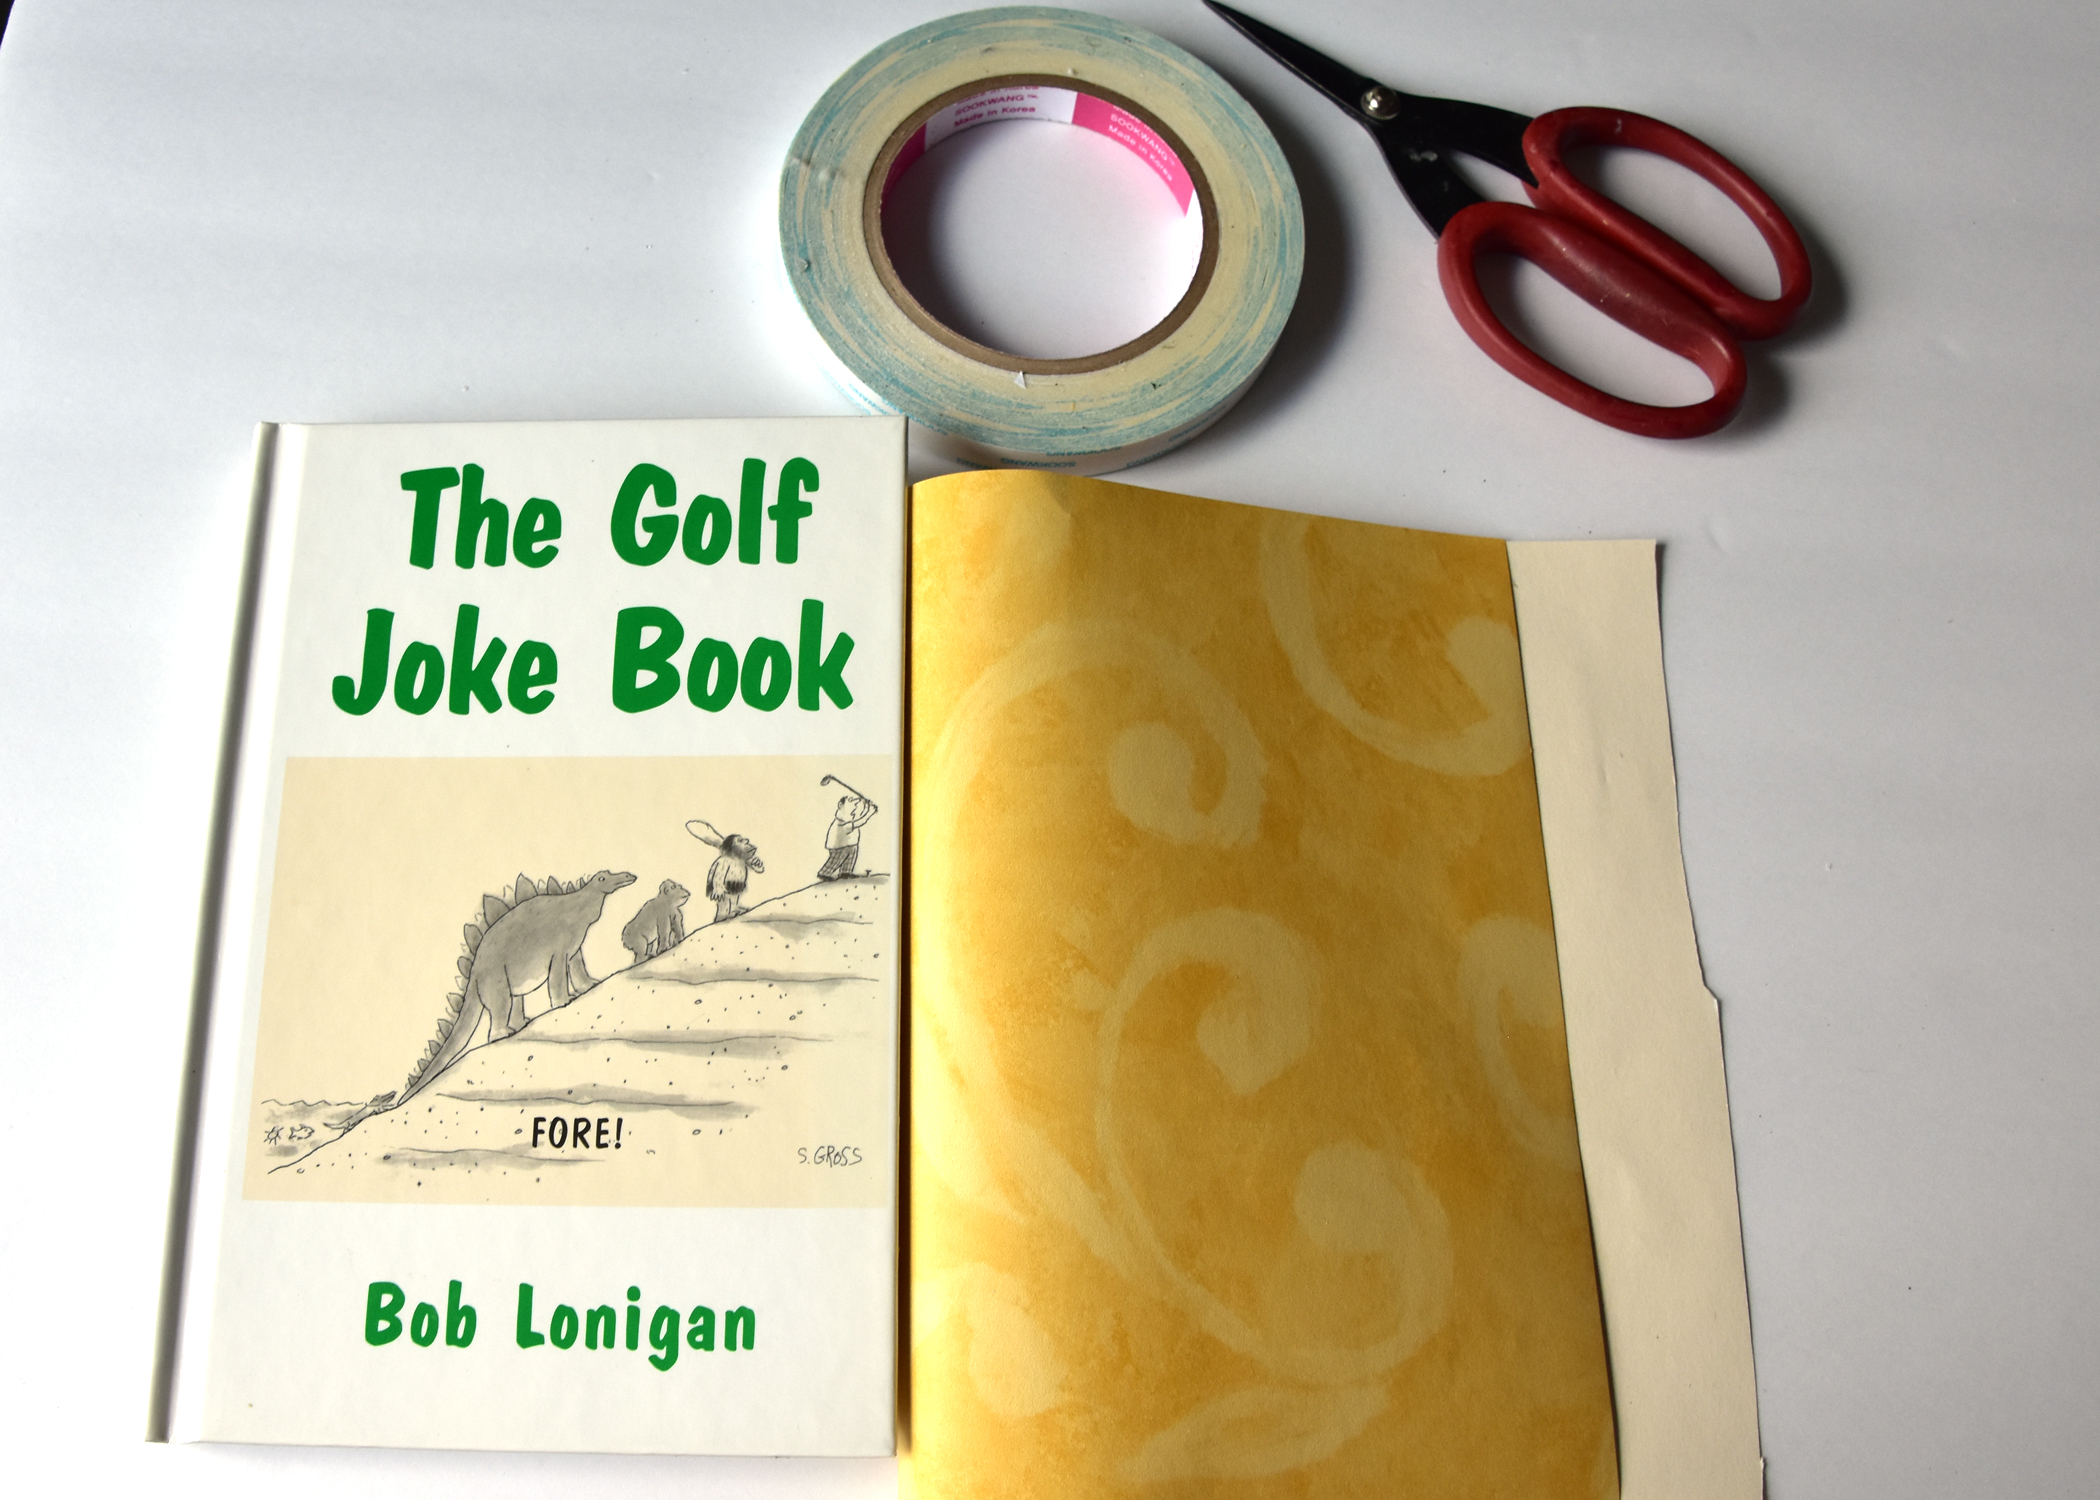
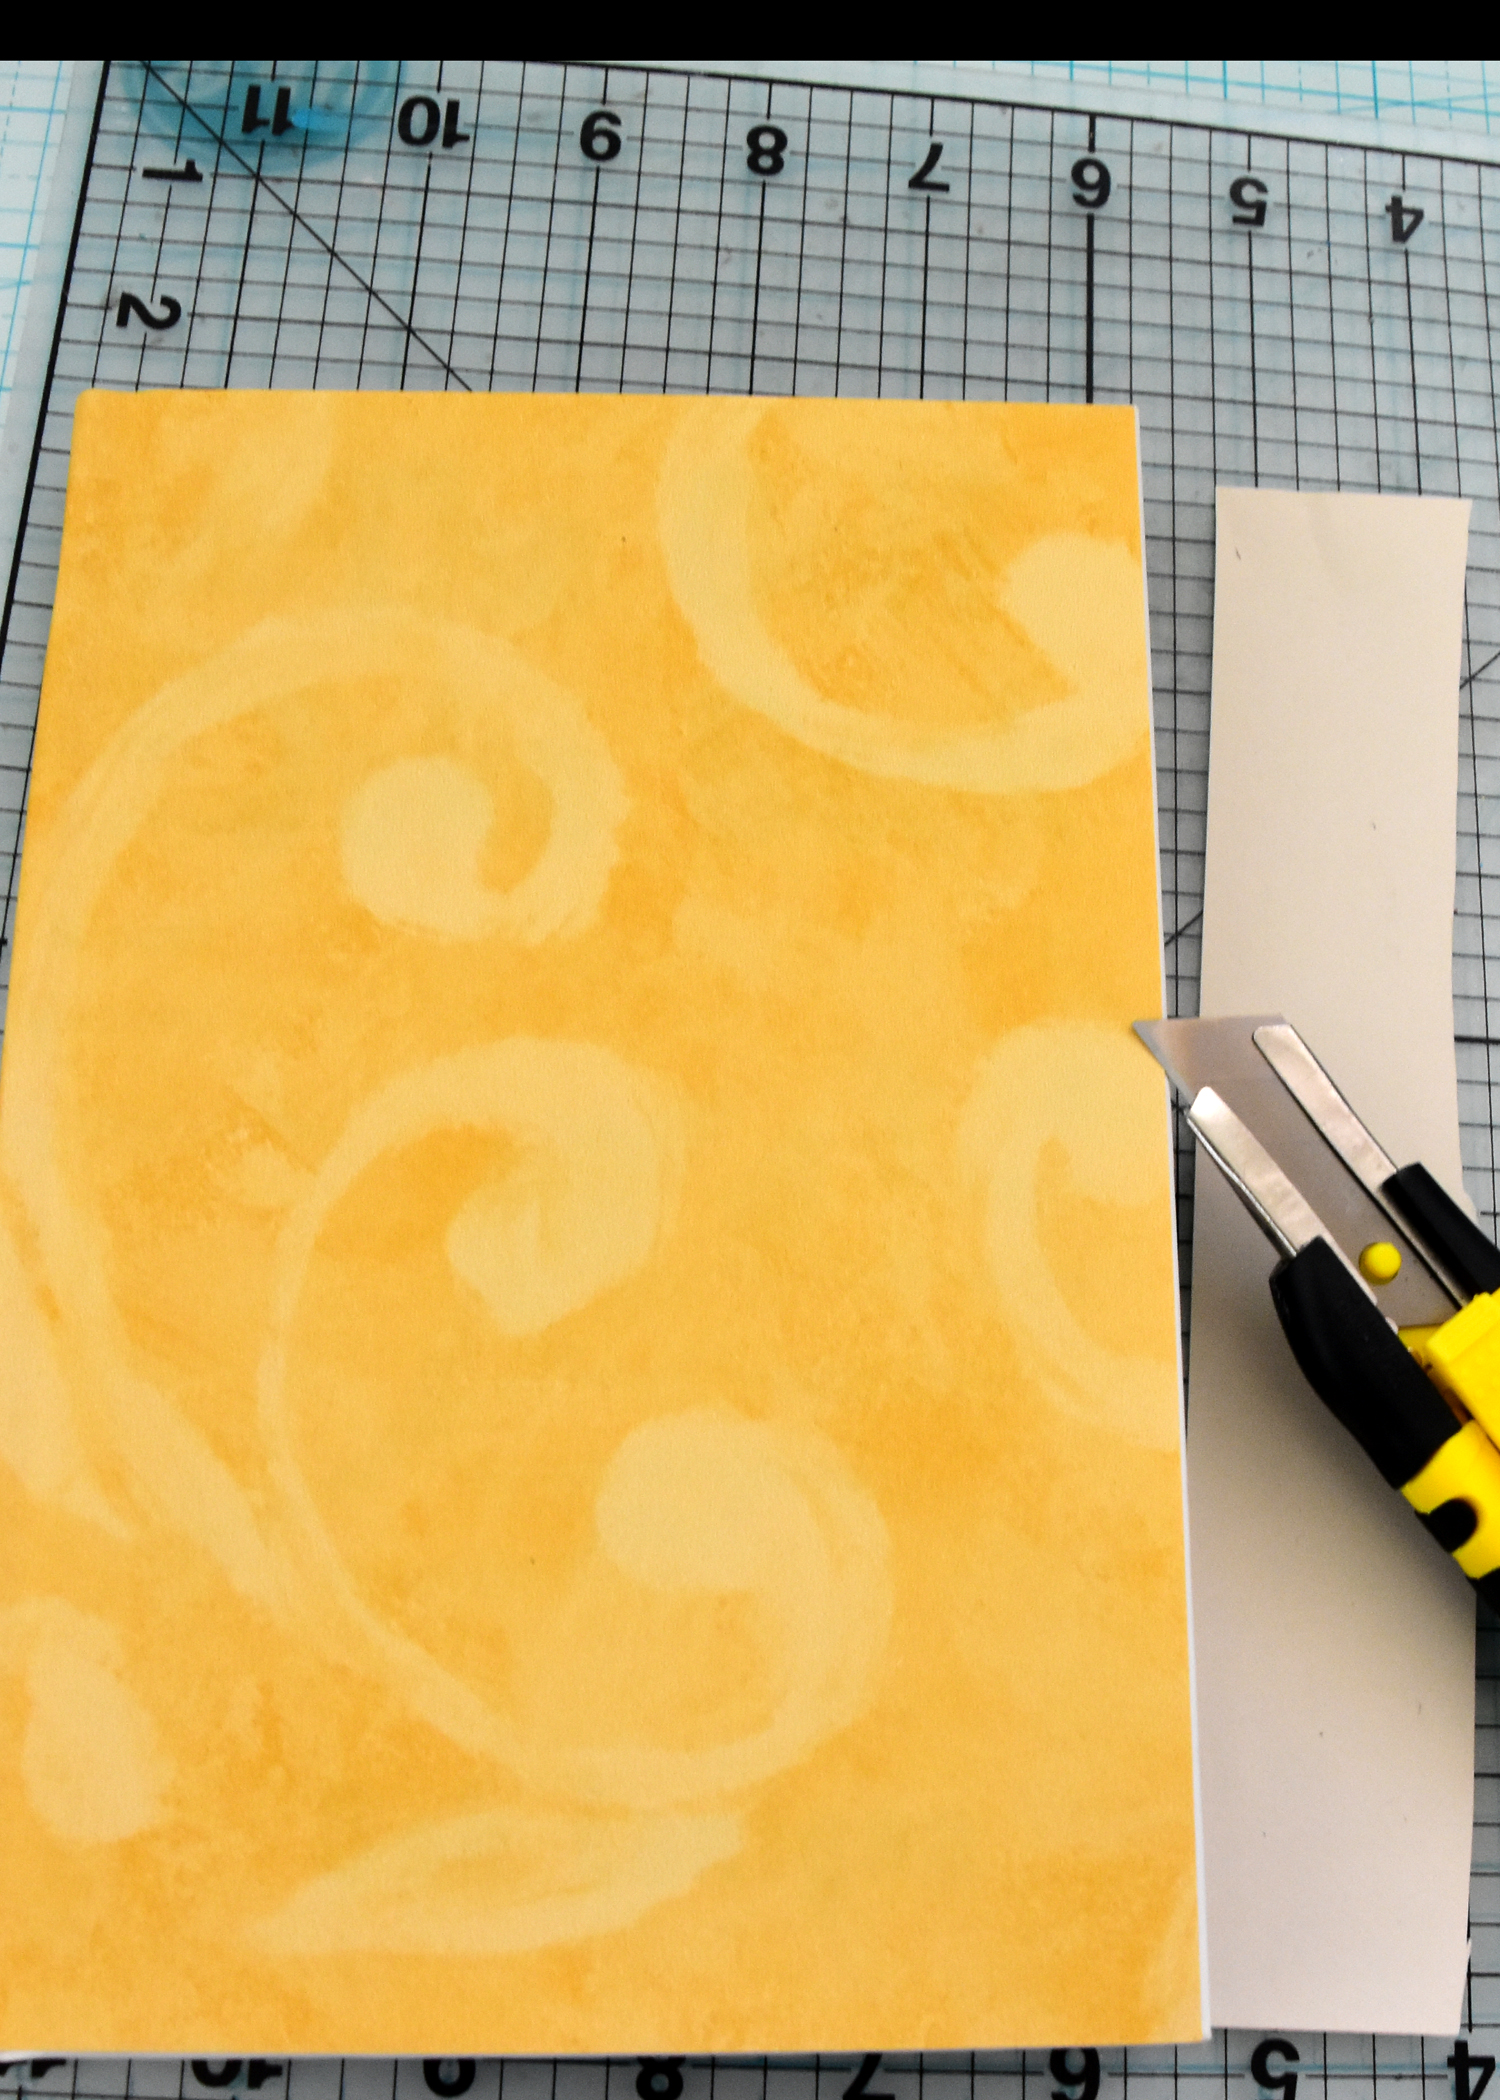
Then I cut the wallpaper exactly to the size of the book, leaving a little on the sides in case of mistake.

I cover both sides and the spine with double stick tape

I carefully apply the wallpaper first to the front, then the spine and finally the back of the book

I cut the extra paper off with an exacto knife

Then add the accent photo or embellishments

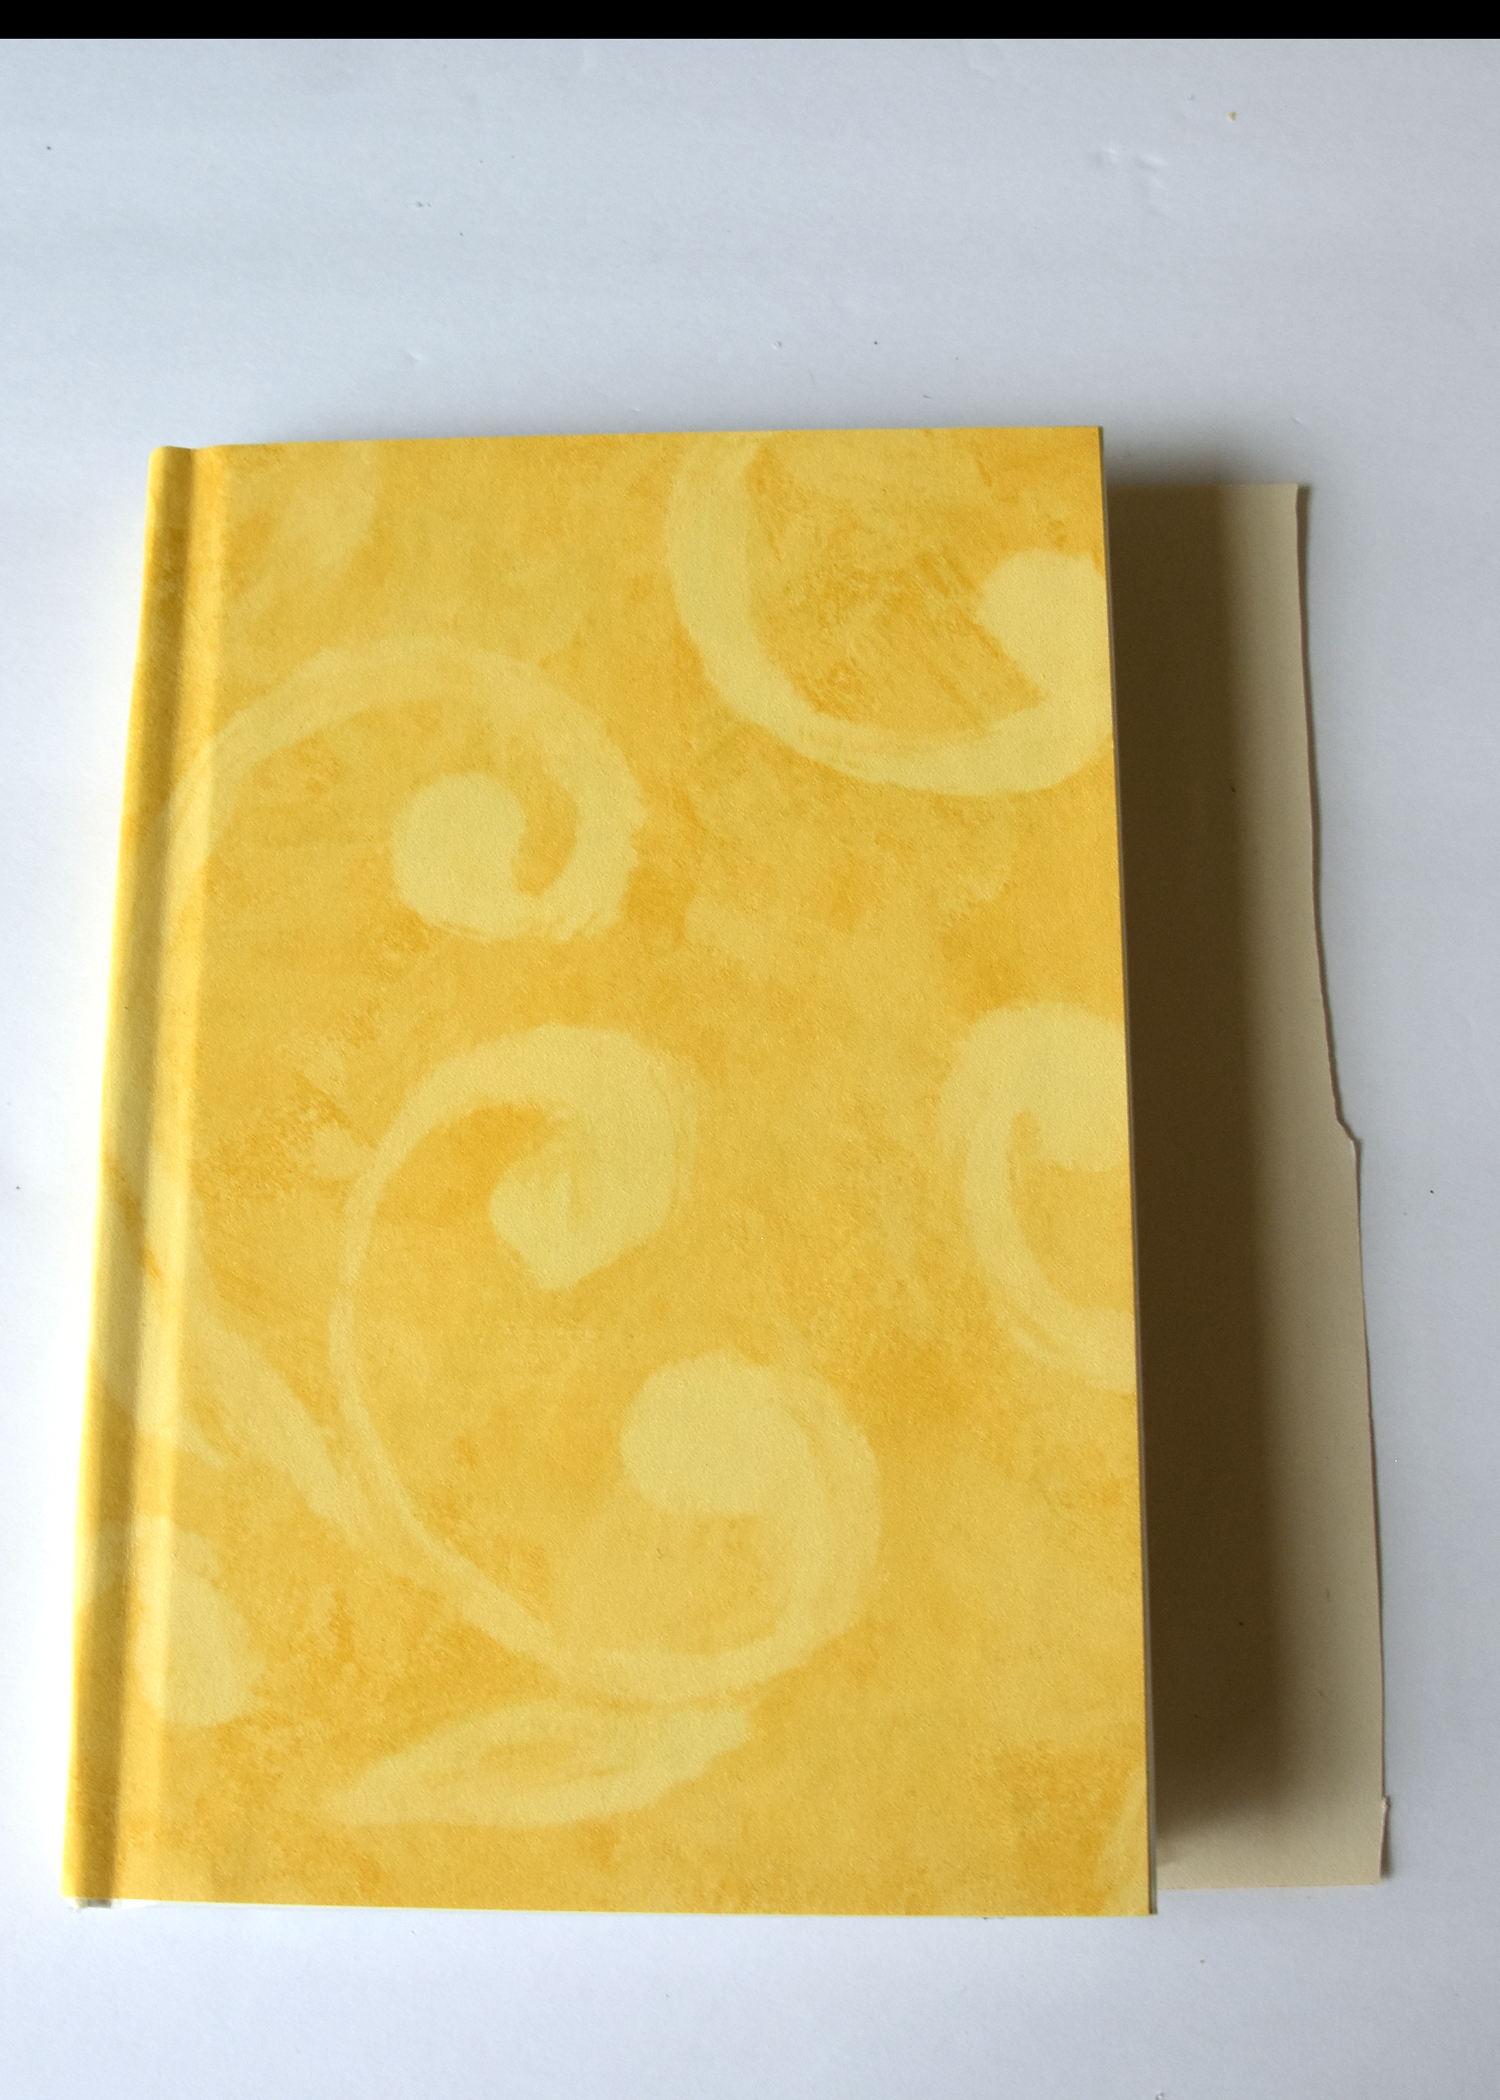
There you go, it only takes less than a half an hour and the journal or book is covered and you can do whatever you desire to finish off your cover decoration.

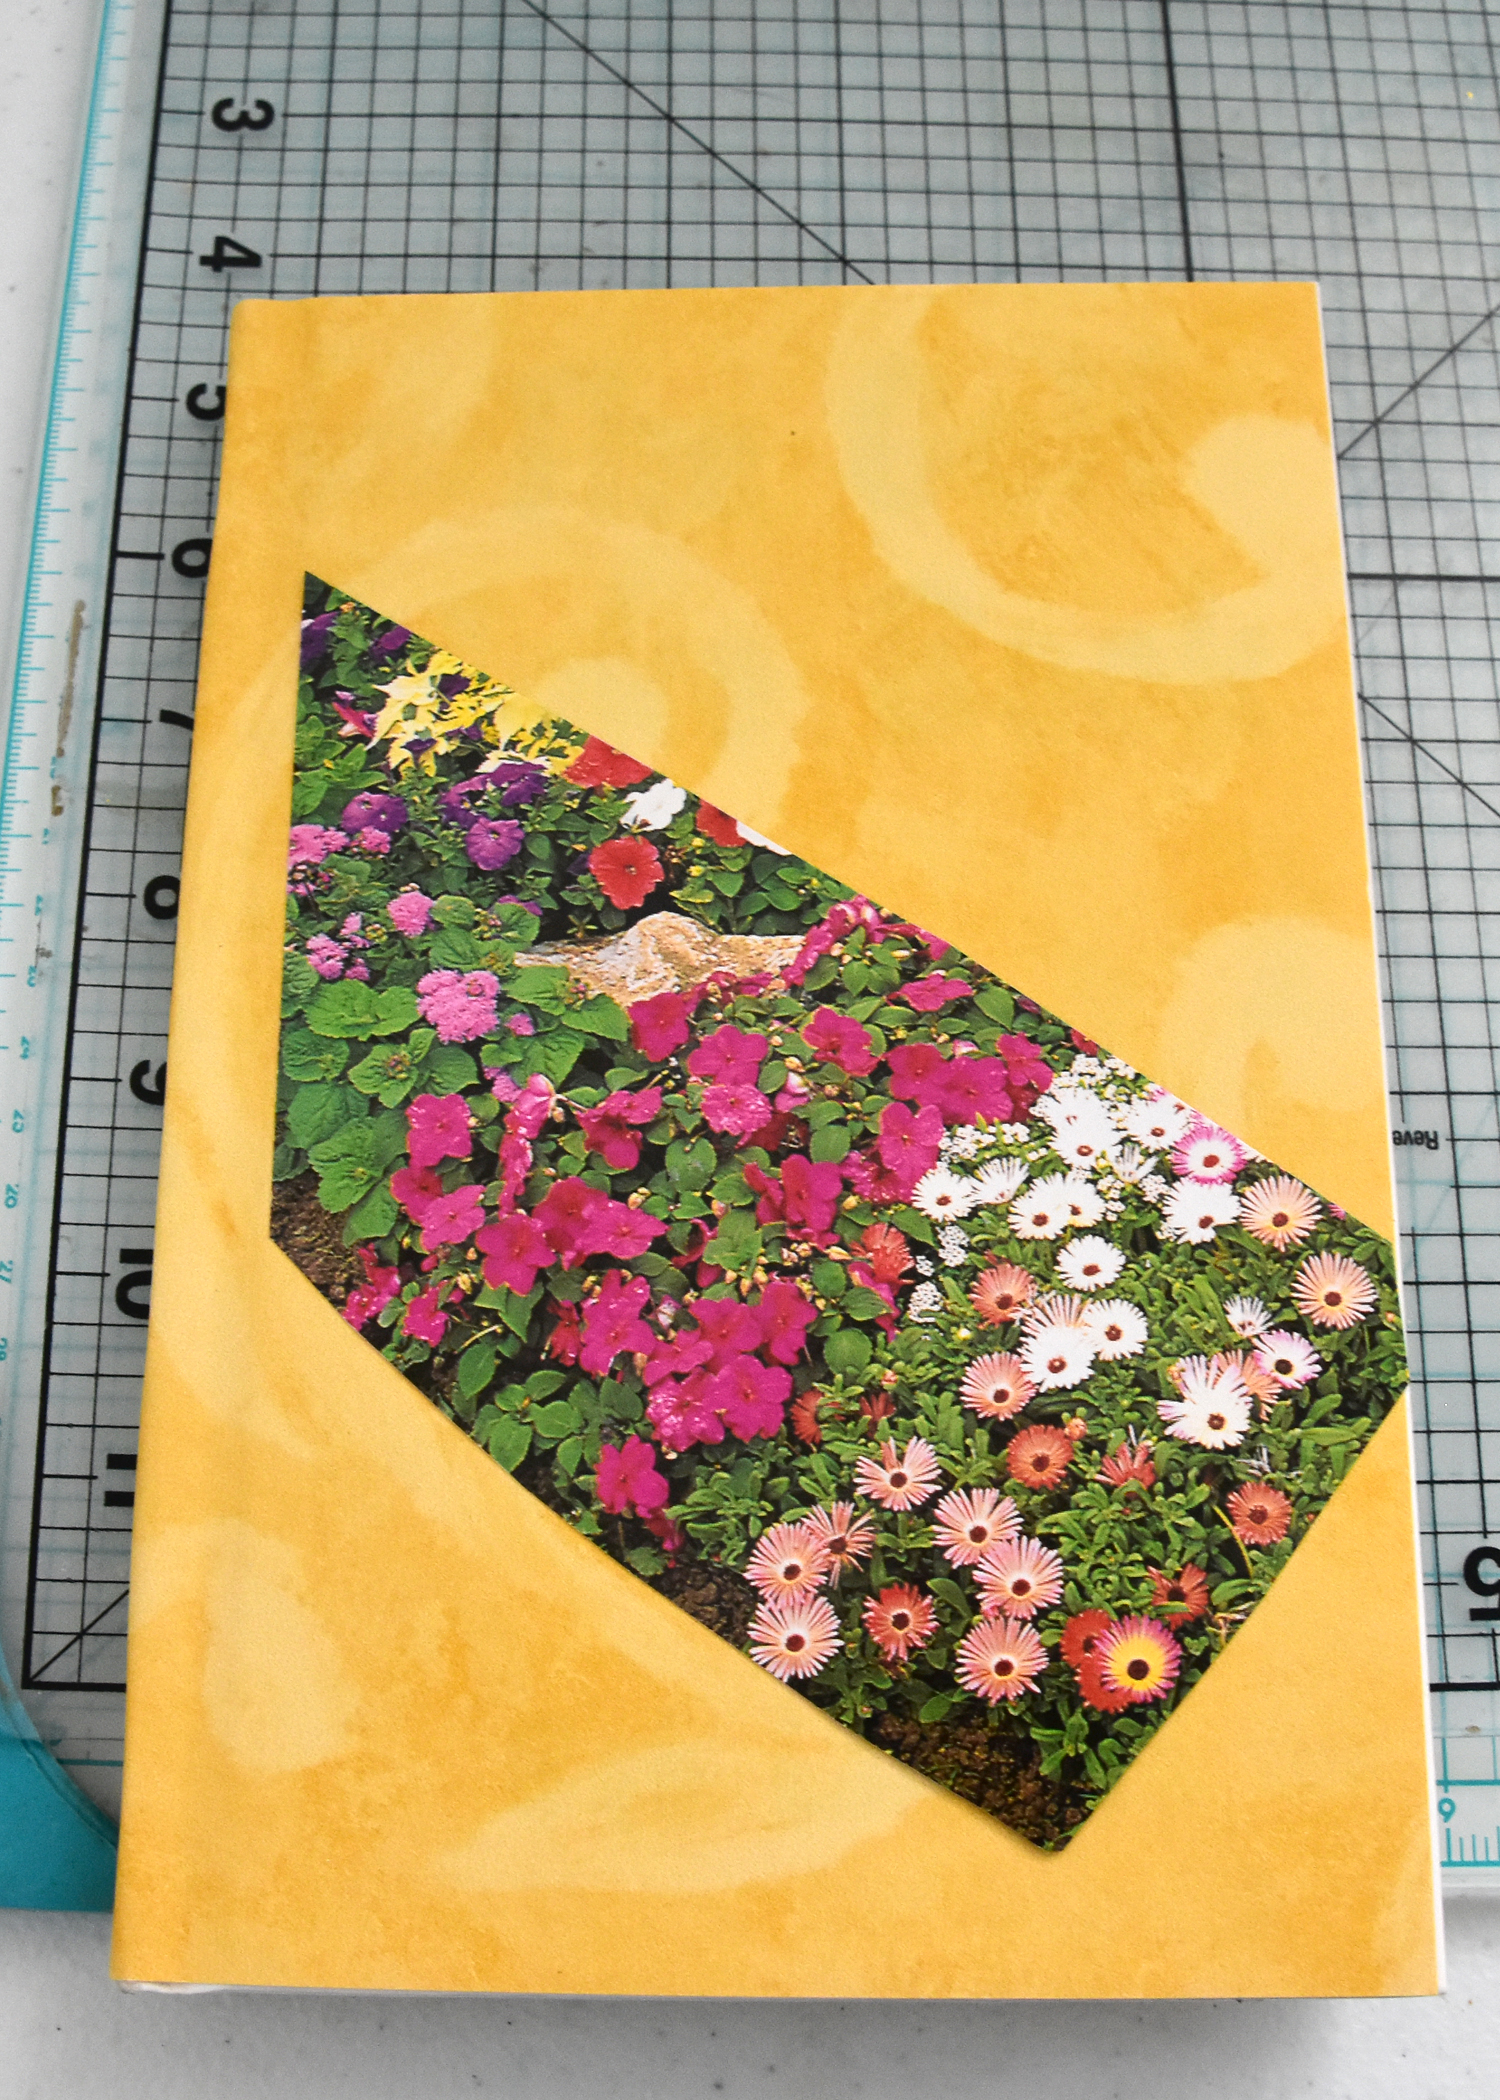
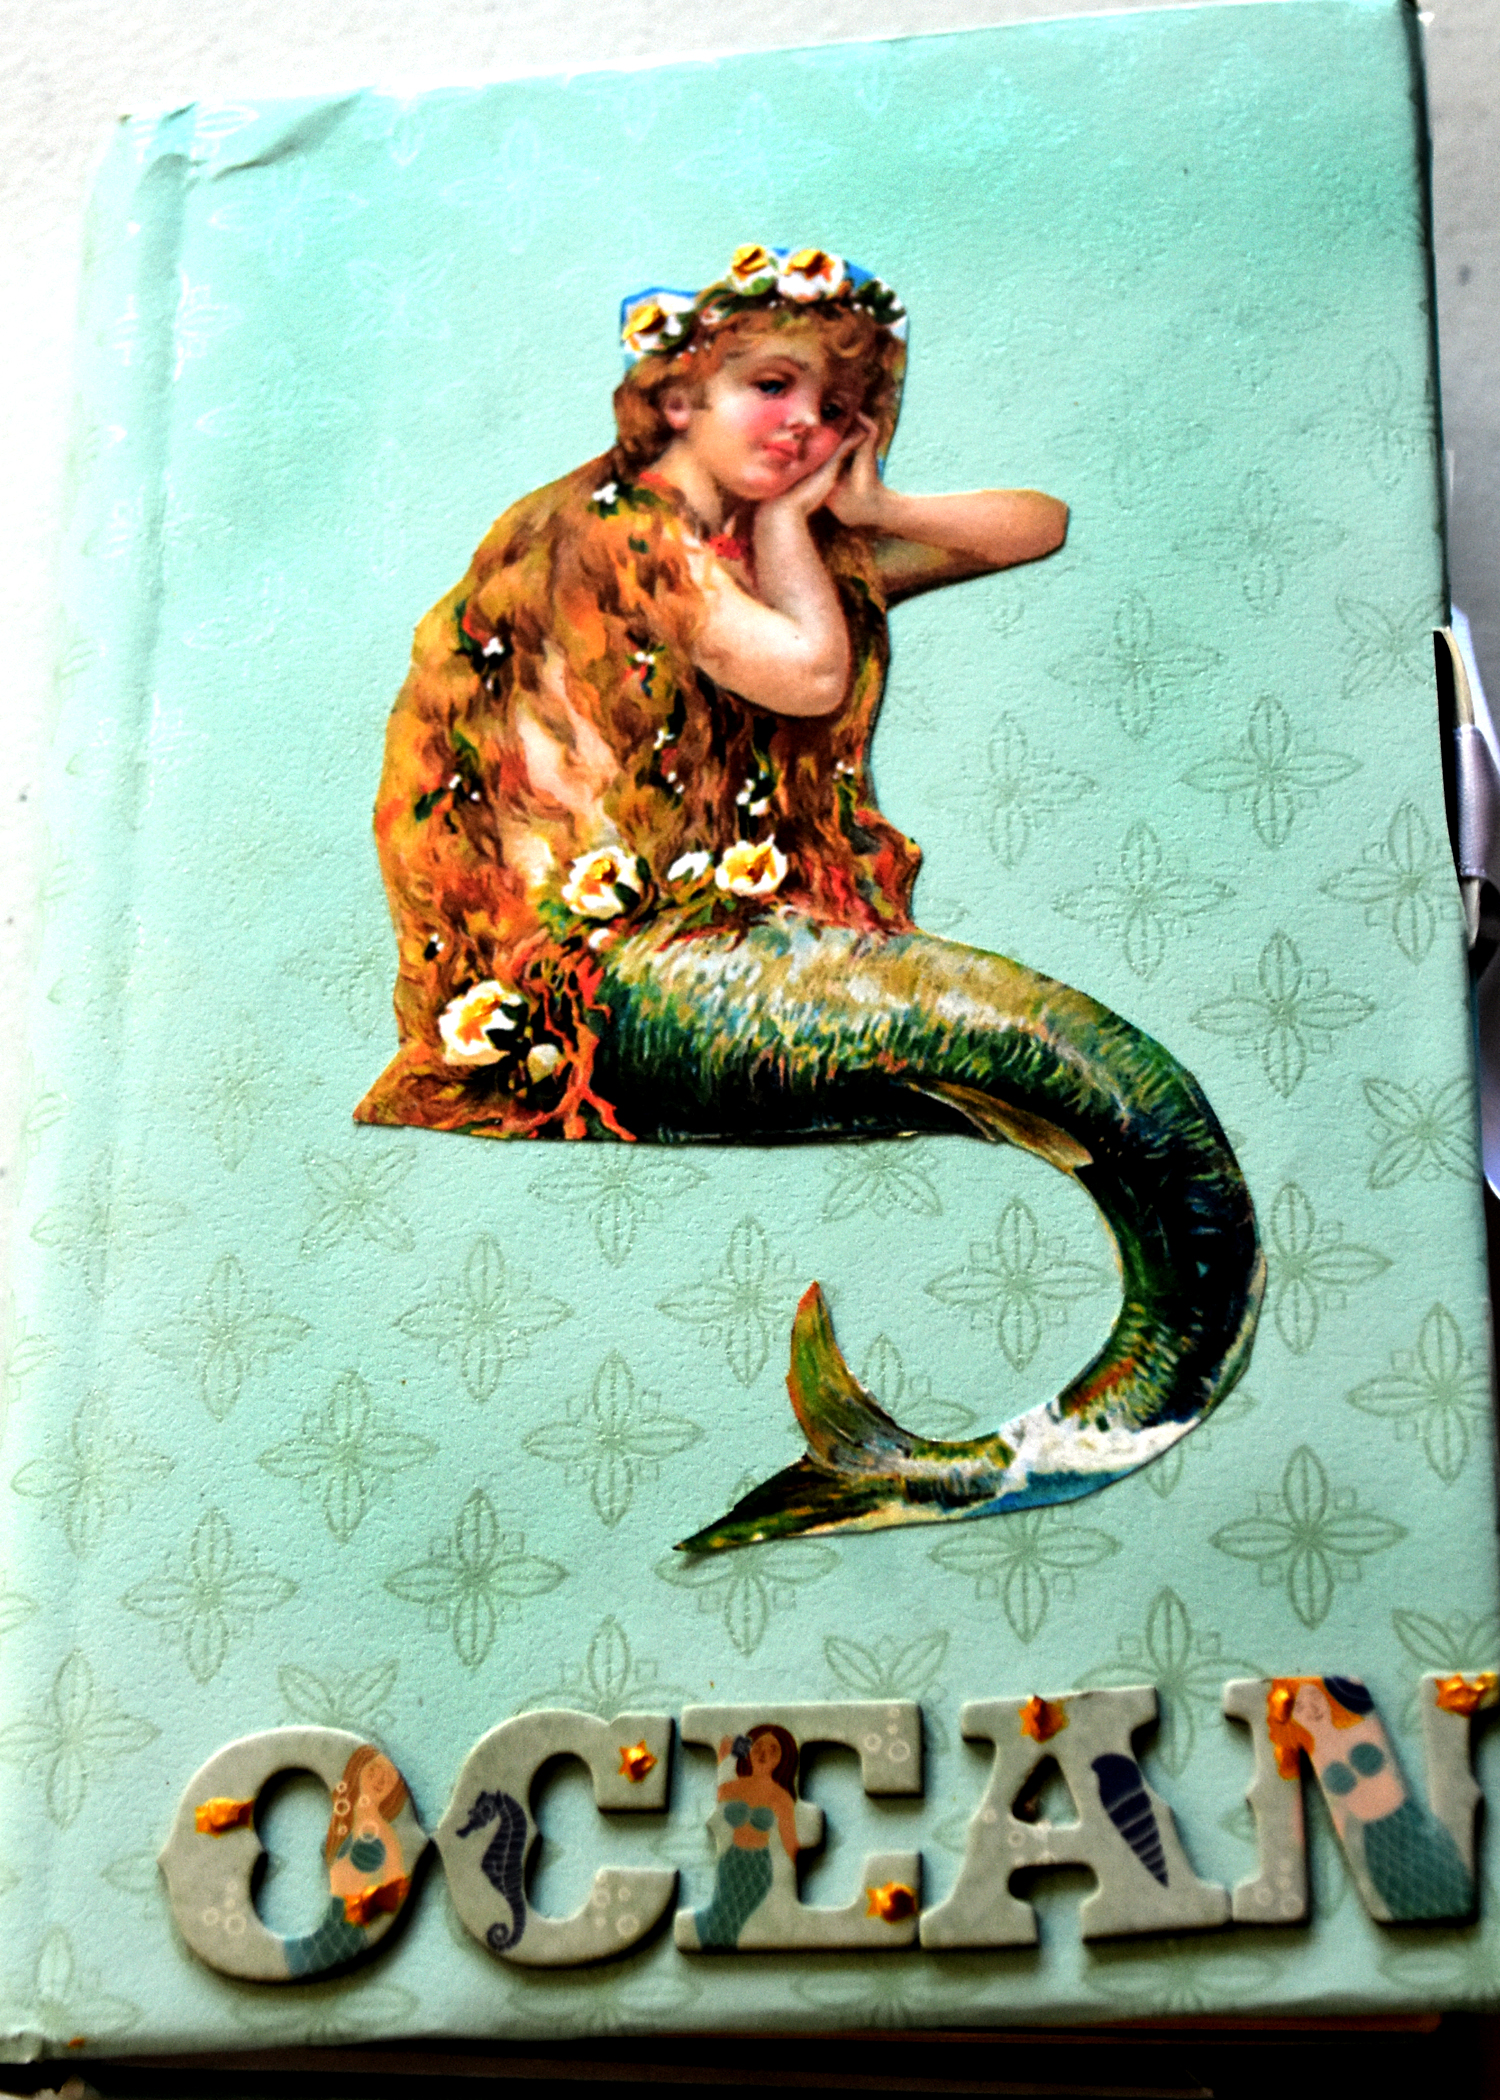
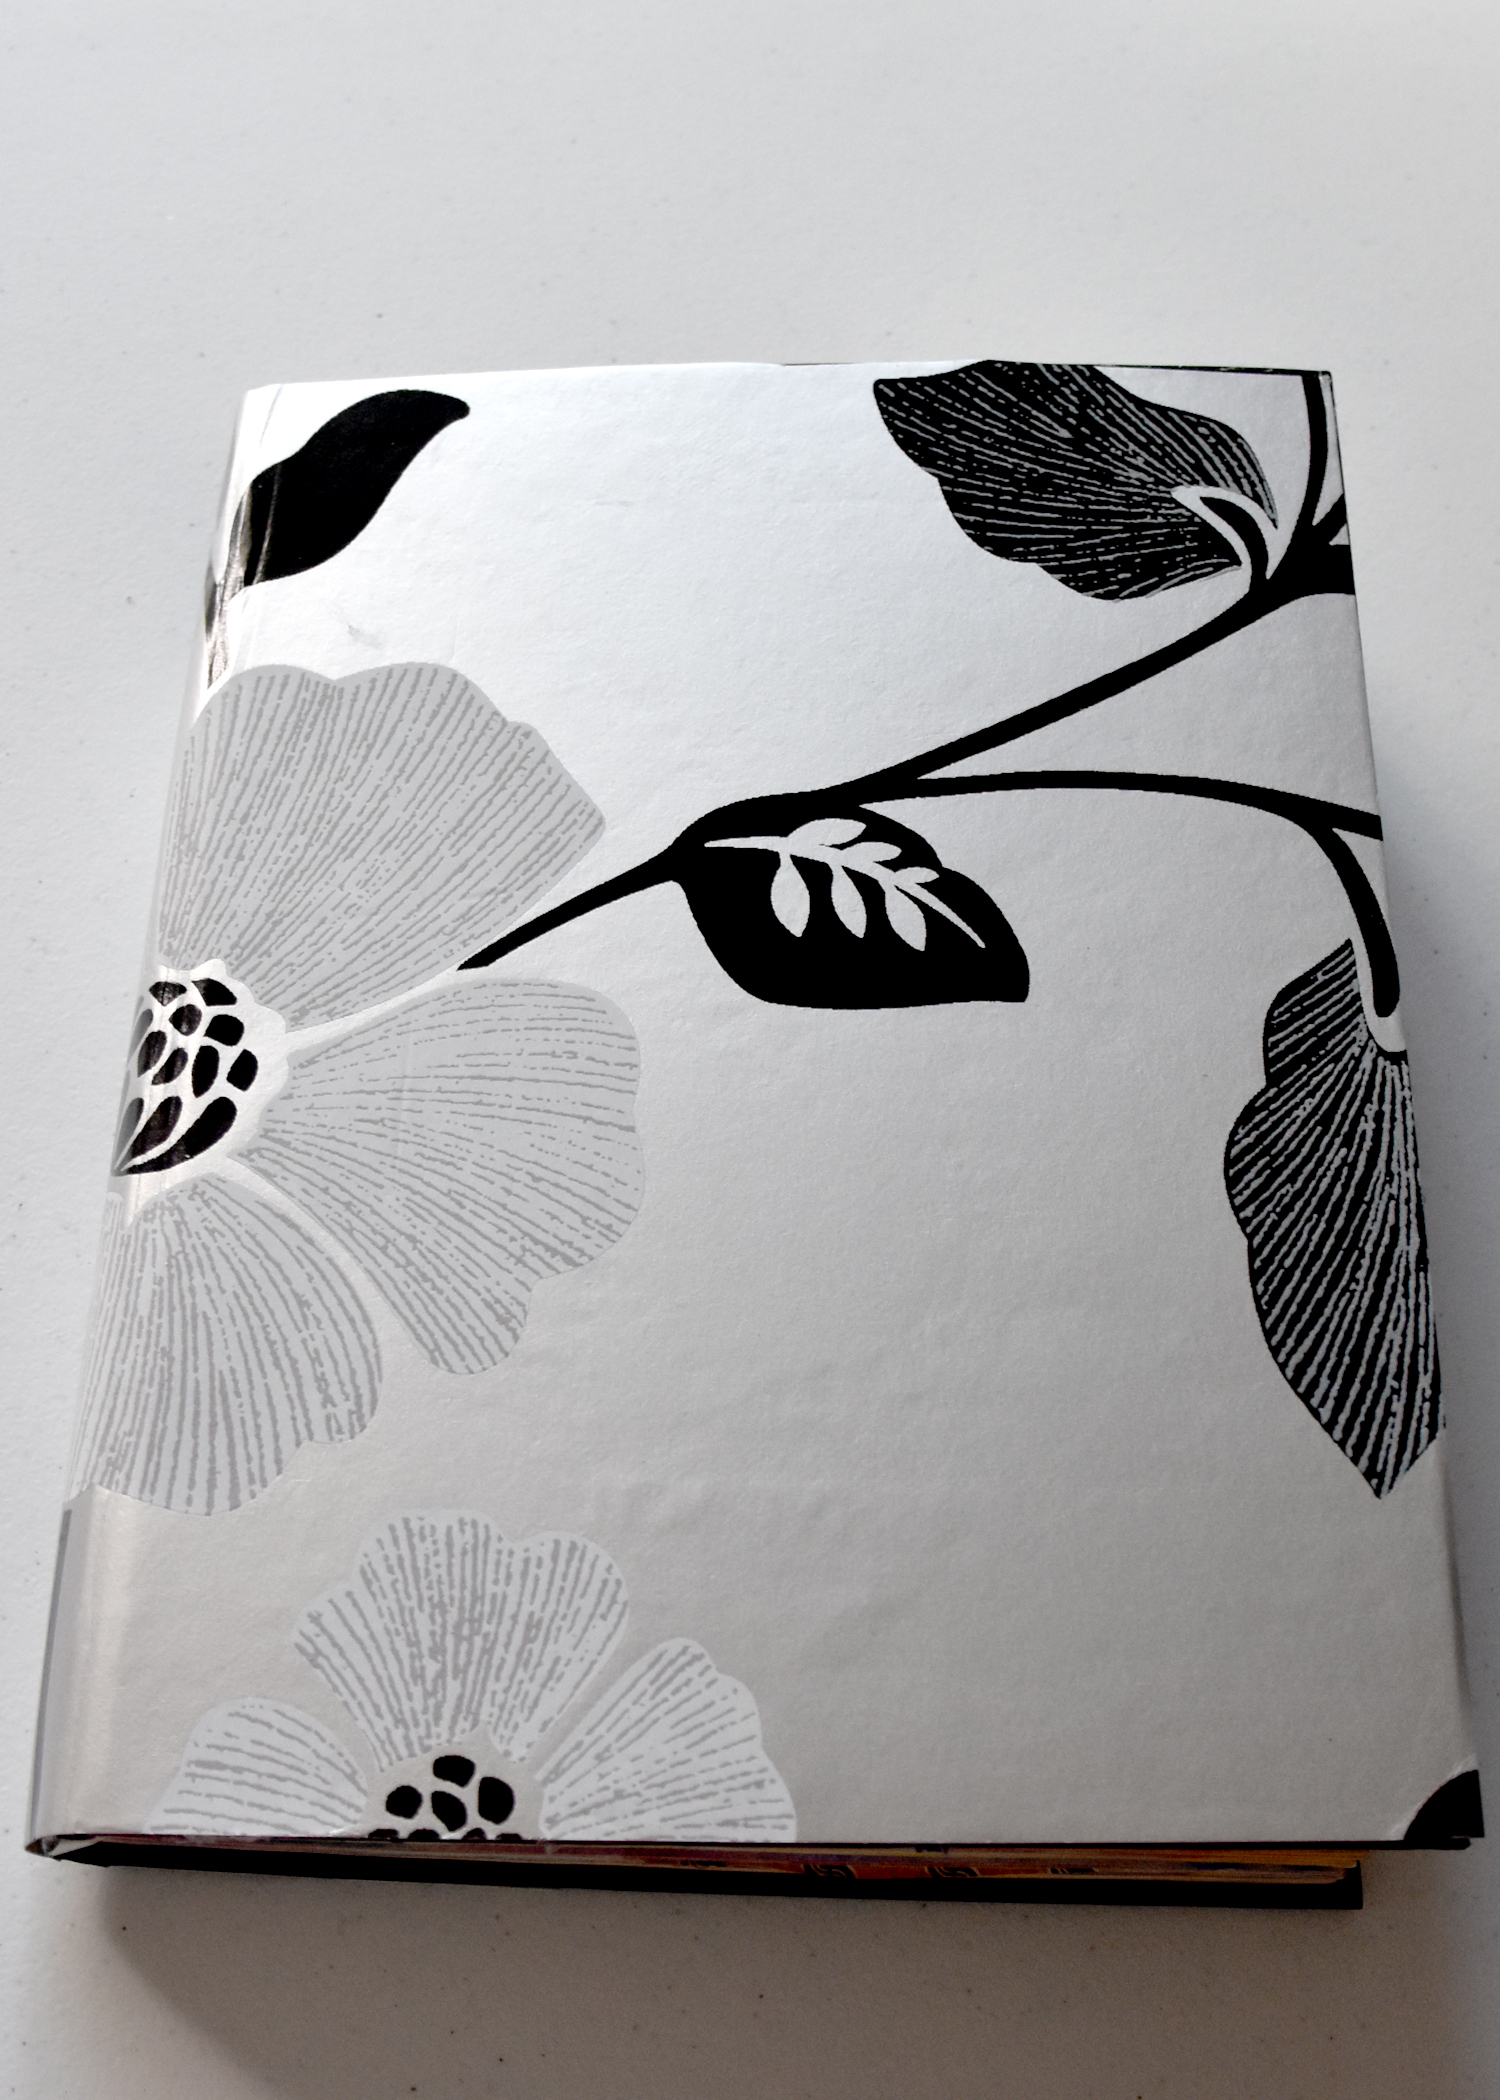
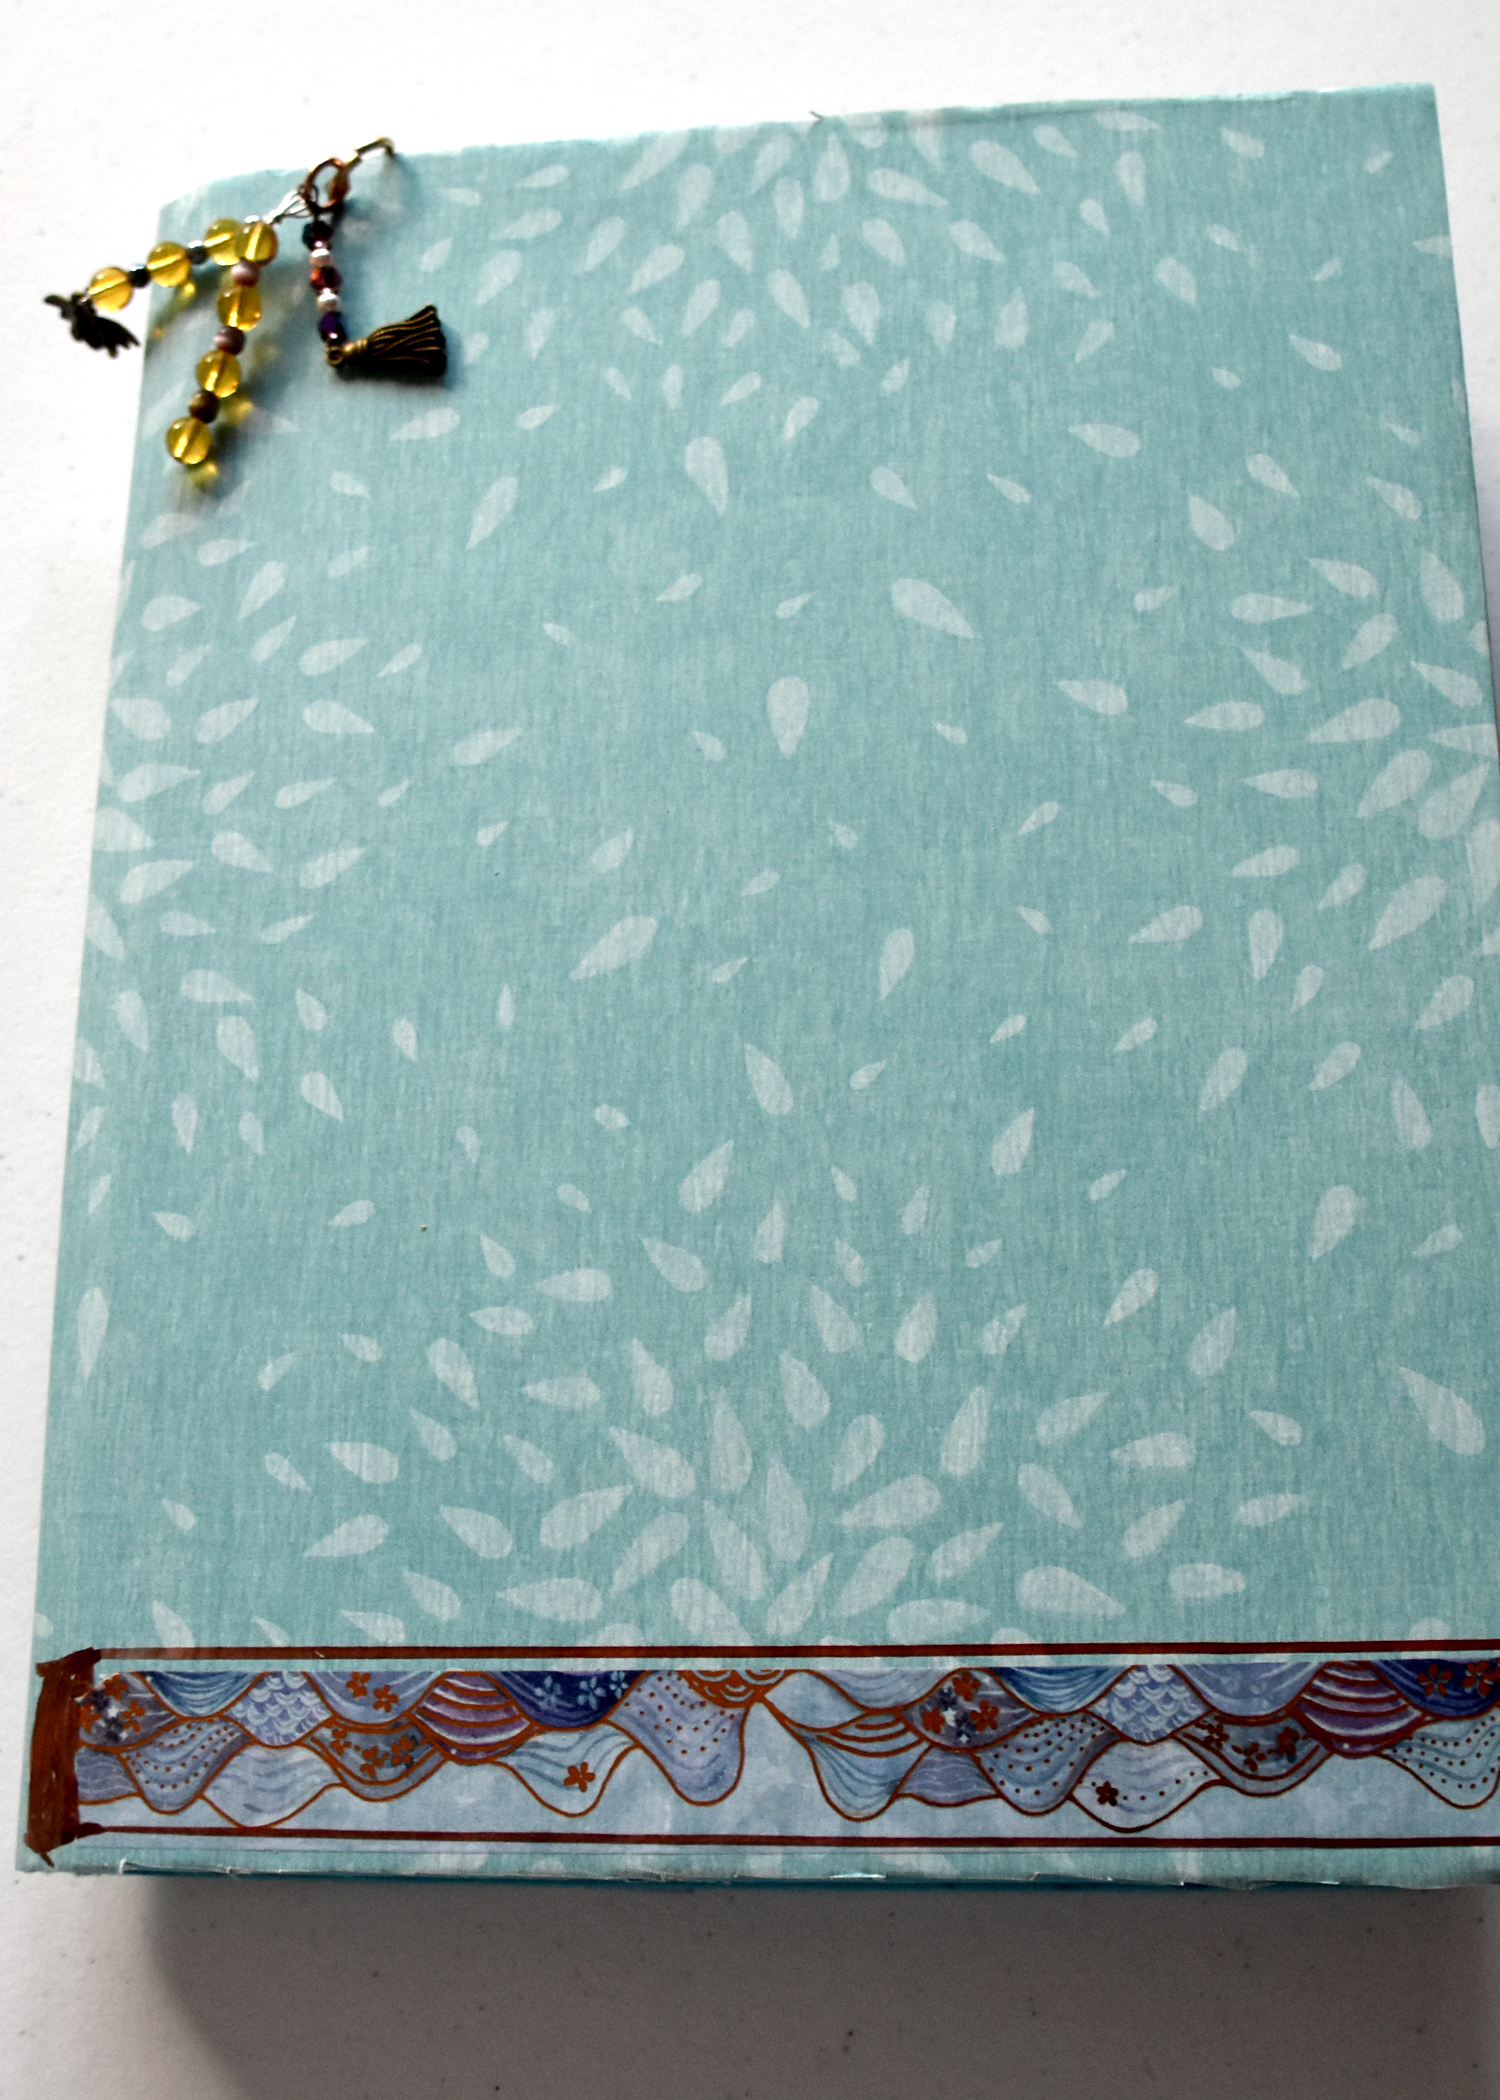
I hope this helps. Here are some other journals that I have used this technique to cover.

Mermaid journal

Well, good luck with making your covers with this versatile and easy substrate. Happy creating.

Free tutorial how to make photo / business cards bookmarks

I like to give a small gift to people who purchase items from my etsy shop.  I came up with this idea to make a small photo / business cards bookmark.  I use some of my photographs, black card stock, business card and wrapping tape to make them.

DSCN6354

You cut out the card stock to fit the photo and the business card.  Glue the photo down on one side and then glue the card on the back side.DSCN6383

DSCN6382

DSCN6384

I made this message and printed it out on my printer.  I cut it out and added to the photo side of the bookmark.DSCN6386

Then I covered each side with two overlapping pieces of  wrapping tape to seal it and cut off the extra tape.DSCN6388

Now they are ready to add to a purchase from my  etsy shop as a small bookmark gift.

DSCN6389

Hope this little tutorial will inspire you to create something unique with your business cards.  Enjoy.

Free tutorial; Lace and ribbon organization

Since I am home bound during this pandemic, it is a good time to organize some of my art studio’s supplies.  I got this nice idea and free down load from Kerryanne English at shabby art boutique.  (https://www.shabbyartboutique.com/2020/03/free-printables-shabby-chic-lace-ribbon-holders.html) .  I printed out the cards on card stock and glued another piece of card stock to them.  Then I cut them out.  ribbon boards

Then I got out all my bags of lace and ribbon pieces and wound them around the card and fashioned with a straight pen.  ribbon boards 3

I had a box that I found at Target that was empty on the shelf.  It had held 5 inch ornaments for Christmas.  They gave it to me.  I now have my lace and ribbon cards organized in it.ribbon boards 1ribbon boards 2

This is standing up by my desk and I can easily see what colors and what pieces of lace and ribbon I have available when I am making my journals.

Thank you Kerryanne.

Free Tutorial how to make a mixed media junk journal with Graphic 45 Enchanted Forest

enchanted forest journal 1 net

enchanted forest journal net

Enchanted Forest travel journal

I love making these recycled travel journals and thought I would write up a tutorial on how I made this one.  I started out with the paper;  Enchanted Forest by Graphic 45.  Then I got an old 2 ring book I found at an estate sale.enchanted forest blog 1 net

enchanted forest blog 2 net

inside of binder

I used the pages in the binder to measure and cut the paper for the journal.  Most of the paper was white card stock, some of the pages were from the EF ( enchanted forest) paper.enchanted forest blog 4

enchanted forest blog 3

I cut out the princess from the paper and a backing paper for the cover image.enchanted forest blog a

Covered the cover with black card stock and used golden heavy gel gloss and a stencil to texture the cover.enchanted forest blog c

I then painted the dried texture with 4 colors of Lumiere paint and brushed it with a cloth to mute and blend the colors.  enchanted forest blog d

I glued down the background and used foam dots to raise the princess image up on the cover.  I added Swarovski crystals to the image.

enchanted forest blog e

crystals on the side of the photo

Decided to add extra bling on the side of the cover.enchanted forest blog f

Then I went through the pages; distressing the sides and adding handmade pockets and tags.  I cut out some of the images from the Graphic 45 paper to make embellishments.

enchanted forest journal 10 net

This is a tip out page that I added for more room to put photos into the journal

enchanted forest journal 3 netenchanted forest journal 6 net

enchanted forest journal 9 net

enchanted forest journal 11 net

And I made a small book to tuck into a pocket to put my private thoughts.enchanted forest journal 4 netenchanted forest journal 5 net

Here is the journal finished and ready to sell in my Etsy store.enchanted forest journal net

Hope this helps you create a journal of your own from a recycled book.  Please leave any comments or questions below.  Thanks for dropping by.

Free Art journal Tutorial; quick journal page using Neocolor water soluble Pastels

Sometimes I want to make a colorful art journal page quickly. I also prepare my travel journals ahead of time using this technique so that they are ready to use on the road.  I also sometimes take the smaller set of pastels in my travel kit.

I use these Neocolor water soluble pastels.  I thought some of you might want to try this fast technique.

I bought these online from an art outlet.  They are not inexpensive but they last a long time.

First I glue 3 pages of my journal together to make a substrate that can handle the water you will be adding.neocolor pastel tutorial page.jpg  I normally use only 3 complimentary colors for a page.  Here I start with a sky blue on each corner.neocolor pastel tutorial page 3.jpg then a yellow , followed by a gold in the middle.neocolor pastel tutorial page 5.jpgYou use the pastels like a crayon. The next step is where you have to be careful.  You want to start to blend using a moist (not too much water) paint brush., just blending the colors together.  If you use too much water with these pastels it dilutes them and makes your paper wrinkle a lot.

Dry this page now.neocolor pastel tutorial page 8.jpg  I like to add a frame to the page which I do after the page is dry using two colors of brown ( one dark on the outside, one lighter on the inside)

Dry the frame.  Here is the finished page that took about 15 mins. neocolor-pastel-tutorial-page-12  Finished , dry and ready for me to write my day’s adventures down.

Here is a page in my journal that I did with lots more preparation.  I glued pages, used 3 coats of white gesso ( they need to dry between coats) and finally when completely dry, applied spray paints.  This took a day since you need the gesso to completely dry.  Now I will admit I like the effect better but sometimes I do not have the time to do it. neocolor-pastel-tutorial-page-13  Thanks for looking at this tutorial;  I hope you enjoyed it and can use it in your creative work.  If you have any comments please leave them below.  You can find my mixed media journals and journal kits in my etsy shop .  If you want to see my photographs and our travel adventures dog and house sitting in England, look here.

Free tutorial Altered book art journal

moongoddess-cover-redo  Here is the process; I start with an old book that I thin out every 3rd page. Then I glue 3 pages of the book together to make a strong base for the art work. I use white gesso to paint every page and let them dry. Finally comes the fun part. I paint each page with metallic  (lumiere paints)and glitter paints making a book with a rainbow of colors.moon   goddess 1.jpgI added a hand made pocket with a tag here.moon-goddess-3

Then I put pieces of my art work, Graphic 45 paper, envelops, tags, stamps, clips and other items on the inside pages of the altered book.moongoddress-1 This is one of my handmade tags.

The cover is made by cutting an oval and placing the photo in the inside cover.  The back  cover is also  texturized  ( with glue and tissue paper) , gesso, stained and painted. The gears, the clock and the key are added with gesso.  I touched up with distress inks and gold foil swirls. There are 8 Swarovski AB crystals. I have added a ribbon closure to keep all your art work safely insidemoongoddess-tie. The Image of the Moon Goddess is one of my original metallic photo composites.

Hope you enjoy the photos and the altered book.   I make about one of these a month and sell them when they are done in my Etsy store; https://www.etsy.com/shop/LDphotography

This book was sold right away.


If you have any questions please leave a comment and I will answer them.  Happy creating!

Free , quick and easy tutorial; Christmas art journal page

Last night I was inspired by a tutorial I found on Pinterest.  It was from the Somerset studio’s, Stampington Place with guest artist  Ivy Newport ( https://stampington.com/blog/2015/08/28/guest-artist-ivy-newport/)  This was an inspiring tutorial that involved many steps to create an art journal page.  I just wanted to do something in the hour or so I had available last night.After looking at Ivy’s work my fingers and mind needed a creative spree.

So I got out my art journal and glued some pages together.  Painted on a thin layer of  gesso  ( dried with my hand dryer). Then I  dug through my stash of Christmas stuff that was sitting on the floor next to me ( I am a messy artist).  I saw some old Christmas cards  that were so beautiful I could not throw them out and started to arrange them on the page.xmas journal page 2015 4  Then I saw some glittered tinsel stuff ( also on the floor) and put some of it under the cards.xmas journal page 2015 3

I liked that , and glue everything down with some heavy medium gel and dried it.  Ivy’s tutorial had her using white paint to blur the edges of the images so…out came the white paint.  I love to paint with my fingers so I had fun.xmas journal page 2015 2

After I put thin layer of white paint diluted with water over most of the images I got my wash cloth up from the floor and wiped off the faces I wanted to see.

Then I glued some snowflakes that I had ( no not on the floor) but in the drawers on my craft desk all around the images. xmas journal page 2015 I felt quite good about the page but it need more.  I added gold crowns for Mary and Jesus and put dots of gold glitter in the middle of all of the snowflakes.

There an art journal page done in one hour!  Left out to completely dry over night and here it is;journal page angels 2015 Now this simple page is not in a league with Ivy’s stunning journal page , but I was quite happy with my quick creative fix.  Sometimes you just need to have a little inspiration and then make something quick and easy.  Thanks Pinterest, Ivy and Stampington Place!  Enjoy!

free tutorial DIY ; Playing with Pebeo Prisme paints

this is my etsy shop where I sell my handmade journal


I am in the middle of deciding what to keep from my craft studio and what will not still be good after a year ( we hope to go back to Europe early next year) .   I came across some Pebeo Prisme paints that I bought at Micheals last year.prisme paints  Since I do not think they will last a year in a storage place I decided to try them out.  I took some mini composition books and a brush and had fun painting and dropping different colors on the covers. prisme paints 6 covers  1 Then I held them at different angles and let the colors mixed.  It made a thick marbling effect.  I took a toothpick and swirled them around a bit and left them to dry.prisme paints 6 covers 3 It takes 72 hours for the paint to completely dry and I think you should dry them in a well ventilated room. prisme paints 6 covers

When the covers dry, the thick paint makes a honey comb design ( you have to have a thick layer of paint to get this effect).  The paint dries glossy and the colors are brilliant.  In person, it has a 3D effect, that is not captured well in the photos.  I put it on paper and tags too.  prisme paints  paper 1 prisme paints  paper  From the first photo you can see the thick dripping effect.  You are supposed to clean the brush with mineral spirits but I had none.  I just rinsed by brush in water and wiped it clean on a cloth between colors.

I really like the effects and the way you cannot predict how it will look when it dries.  I thought I would share my experiences with you.  If you have experimented with this paint please share your experiences in the comment section.  When we return from our trip I will purchase some more of these paints to play with.  Happy creating.

Pocket Letters, link free tutorial; see my DIY kits to get you started; thrill your penpal !

What are they?  Here is a link that explains them.

http://janettelane.blogspot.com/2015/02/what-are-pocket-letters.html

Now that you know about them….they are so much fun to get and receive.  Your art friends and even your non art friends will be thrilled to open the mail box and find a stuffed #10 envelop with their name on it.  When they open it up and see all the clever things you have enclosed for them to enjoy and use in their own pocket letters they will love you.  There is also the letter that is tucked into one of the pockets , that expresses your personal greetings.

I have been doing swaps like these fb pages;

https://www.facebook.com/groups/pocketletterpals/902454986503639/?notif_t=group_comment_reply

https://www.facebook.com/groups/PocketLetterInspirationAndIdeas/

thee are closed group but just request joining and they will let you in.

I am also cleaning out my craft studio and I have lots of art cards ( 2.5 x 3.5 inches) and pocket holders that I am selling in my etsy store.  I decided to put together DIY kits for beginners with everything you need to get started for only $5.99.  I would like to share the fun and make it easy to play.  Here is the link;

https://www.etsy.com/shop/LDphotography?section_id=17672510&ref=shopsection_leftnav_1

pocket letter wine 3stampunk halloween pocket letter kitpocket letter halloween 2 bpocket letter gold flowers 3  Happy creating and mailing!

blue collage ( now gifts from the Sea) free mixed media collage tutorial, part 3

I have added micro beads in clear, blue and gold and diamond dust with clear glue to the clay sections Image  An have started to glue down shells ( E6000 glue works)  and embellishments to the clay sections; making sure that I use enough glue to hold them in place and that they are not too heavy for the clay substrate.Image If you look at the tutorial part 2, the shells and the ideas for composition have changed some.  I decided to paint some of the shells that form the outline from the sea to the sand.  I am also playing around with fish and turtle charms to see if I want to use these to connect the two largest sections of the clay substrate.  Stay tuned for the final part of this tutorial.